Share Post
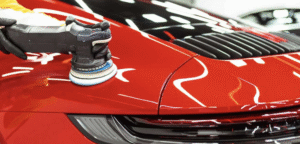
In the world of vehicle repair, time is money and nothing slows you down like rework or quality issues at the final stage of a job. That’s why any successful paint finish doesn’t start with colour, it starts with proper prep. If you’re not getting the sanding and surfacing process right from the beginning, you’re likely burning time, materials and reputation by the end.
With today’s complex vehicle builds, sensitive finishes and stricter OEM repair procedures, bodyshops need to be smarter than ever about their surface prep. Here’s how to maximise your refinish hours from the very first step and avoid the costly mistakes that lurk beneath the surface.
Every scratch matters, seriously
When cycle times are tight and the pressure’s on, it’s easy to skip steps or overlook minor sanding scratches. But here’s the truth, one bad scratch can lead to a total repaint. Small imperfections during the sanding phase can lead to defects visible only after paint and clear coat have been applied.
Avoiding rework means paying attention to every detail, especially during early prep. It’s not just about removing visible damage; it’s about ensuring a flawless surface ready for coating.
What causes imperfections in the first place?
There are several common culprits when it comes to surface flaws. Knowing what to look for and how to avoid it can save hours later in the booth or on the buffer.
1. Coarse sanding without refinement
Deep scratches caused by coarse-grade abrasives can leave behind swirl marks or jagged lines that show through the topcoat. To prevent this, gradually work your way through finer grades, typically from 80 to 180 grit for blocking filler, up to 320–400 grit for e-coat and primer sanding.
2. Improper paint build-up removal
Ever notice a “picture frame” effect where paint builds up around the edges of a panel? That’s often caused by poor sanding technique or skipping steps. The result is a visible raised edge after the final coat.
3. Over-sanding panel edges
Applying too much pressure when sanding edges or curved areas can result in deep scratches or low spots that only show up under the clear coat, especially on metallic finishes.
4. Dust contamination
If dust isn’t properly removed, it can settle into scratches and cause visual imperfections. This is particularly problematic with metallics and fine pearl finishes.
How to avoid these refinish pitfalls
Avoiding issues starts with using the right tools, the right techniques and the right mindset. Here’s how to make sure your refinish process runs smooth from the first grit to the final polish.
✅ Select the proper grit
Each stage of sanding requires a specific range of abrasives. For example:
-
80–180 grit for shaping filler
-
120–180 for paint and dent removal
-
220–240 for fine sanding and featheredging
-
320–400 for e-coat and primer prep
Don’t skip steps. Progressing too quickly or jumping grits increases the chance of leaving behind rough profiles.
✅ Use a guide coat
Dry guide coats help you spot scratches and high/low spots much better than wet ones. These highlight flaws early, before they become defects under clear coat.
✅ Avoid inconsistent scratch patterns
Newer colours, especially metallics, require more precise prep. Inconsistent sanding can lead to poor colour blending and visible patchwork. Always keep sanding strokes uniform, and follow up with fine abrasives before paint.
✅ Proper dirt and nib removal
Feel the panel with your hands. If you detect any dirt nibs, carefully knock them down with a blade before sanding. Then use a fine-grade abrasive around the edges and corners to prevent picture framing.
✅ Watch for over-sanding edges
Sanding too deep at panel edges causes trouble later. Clear coats are thinner than ever, especially on newer cars and they can burn through easily. Apply lighter pressure and follow the contour of the panel, not just your arm’s path.
✅ Remove dust completely
Use clean air and lint-free wipes before spraying. Dust trapped in sanding scratches settles into the final finish, especially noticeable in dark or metallic colours.
Don’t let prep mistakes cost you time
Rework is expensive. It wastes materials, labour hours and productivity. But more than that, it hurts your customer satisfaction and your bottom line. Shops that commit to proactive surface prep, not reactive correction, build stronger reputations and faster turnaround times.

 0
0